Monday, May 24, 2010

Master Bedroom Floor, Fin

After ripping out the crappy underlayment in the master bedroom and assessing the height of the floor, we decided to lay a 3/4" subfloor before continuing with the bamboo (instead of the 1/2" we had planned on). There was a subfloor of 1/2" plywood that was sagging in well travelled areas, like near the door and from the door to the bathroom door. It was really bad which is why we went with the thicker plywood. The trick with laying the new plywood is to make sure none of the seams are within 6"-12" of seams in the old floor being covered. I could tell where they started when they laid the original sub-floor so we started in the opposite corner with a full sheet and that seemed to stagger the seams just right. One thing that made the whole project just that much more annoying was the supplies in the room that had to be moved from side to side, as we finished the subfloor, then the bamboo floor. There wasn't any other place to put the seven flooring cartons and shop vac, and the compressor for the nailer needed to be in the room too.

I thought we could use the framing nailer that we already owned and wasted a good few hours trying to make it work on a scrap in the garage. I finally gave up, the pressure was not enough to get the head of the nail all the way in the tongue, no matter what angle I put the gun at. The bamboo was too dense. I found a flooring nailer at a local rental place and reserved it for Saturday afternoon. Here's the trick with renting on a weekend- rent from a local place that's closed on Sundays, then you get the tool from Saturday afternoon until Monday morning for the cost of one day. If I had rented from HD or Lowes, I would have only gotten it for 24 hours. I brought a piece of the flooring to the rental store to make sure the tool came with the correct "shoe" and asked the tech to set it up for me. He was basically useless. He took it in the back to where they had an air compressor. After 15 minutes, I looked through the glass in the door, there were 6 employees standing around the nailer and my bamboo, some actually scratching their heads. That should have been a clue. We got the nailer home and Wino started by setting it up and practicing on scrap flooring while I face-nailed the first row. The first row is set on a chalk line with 1/2" gap to the wall for expansion. It's then face-nailed about 1/2" in from the edge. We pre-drilled the holes for the nails and discovered that we also needed to pre-drill (with a larger bit) the countersinks for the nail heads. The bamboo was that hard. The tongue side is then nailed down, pre-drilling at a 45 degree angle to hide the nail. Once the first row was in, the subsequent rows were installed using the nailer. There were some issues, for example, the rental guy said to hit the trigger for the gun really hard to get the nail in (this seemed wrong to me since it's air-driven, but I'm just a girl) so Wino was hitting it really hard and the whole tool would bounce back and the nail would end up not where it's supposed to be. The shoe that the rental guy put on the gun was a little worn and wouldn't always sit in the right place, also putting the nail in the wrong place. The bamboo had some hard spots where the nails would curve and come up through the top of the board. We thought we were hitting nails in the subfloor but I had the joists marked and it should have been clear. Then I noticed the tarpaper laid underneath didn't have a hole in it from the nail. There was nothing to do about the curving nails except take the board out and try another one. The other issues got sorted out. Wino decided to try a different shoe on the gun which worked 100 times better. And he stopped hitting it with so much force and started stepping on the back part to stabilize it. This took all of Saturday afternoon and a bit of Sunday morning. On the first few rows we had a little problem getting the flooring to sit snug up against the other rows. I'm not sure if it was a bum board or my first row install but I got a killer upper thigh workout pushing the boards into place while Wino nailed them down. Once we passed that and hit the plateau in the learning curve, things moved along well. I laid and tapped the flooring boards into place and Wino nailed them down, placing boards when I was in the garage cutting the end boards.
We had a nice rhythm going. At about 5 pm, we got to the place where the nailer was too close to the wall to use so the last 3 rows were nailed in by hand by me the next morning, after returning the nail gun. To finish the floor between the bedroom and bathroom, I needed to get creative with some scrap of the flooring and made this threshold piece. It's finish-nailed in and sealed with oil based satin polyurethane. The floor now looks beautiful and feels even better when walked on, and the annoying squaw-squeek in the middle of the floor is gone!

There are two more bedrooms and the hall/foyer to complete but now that we've got the learning curve on the tool, I'm hopeful things will go smoother and quicker. I'll rent the same flooring nailer from the same place, but I won't trust the rental guy to have a clue regarding what he's renting out.

A Fowl Weekend

Sometimes having a deadline doesn't always work, as illustrated by my dilapidated chicken coop in the yard and the 26 chicks and 3 ducklings in the garden shed. Knowing that for at least the first four weeks of their lives with me the chickens would be in a brooder, staying warm and practicing the scratch-and-peck technique mastered by so many before them, I focused on other more pressing projects and the coop has remained untouched. A few days ago Wino and I were given two great vintage doors that will go on the coop. They need to be stripped, patched, trimmed to fit and painted. In my mind I was waiting on the doors because that would give me the design for the rest of the coop. Well, no procrastinating now!

We picked up the chicks at the farm store on Friday. It was crazy when we walked in because they had temporary brooders with heat lamps set up throughout the store- it's not a big place to begin with. There were hundreds of chicks, all chirping.
Usually there's only one or two other people in the store but it was packed that day, not only with people picking up chicks, geese, or ducks, but with mothers who brought their children to watch the chicks and play with them. And a local farmer had set up in front of the attached house to sell veggie and herb seedlings. It was crazy!

The chicks and ducklings are in a brooder made of a recycled compost fence for the walls, cardboard to keep out drafts, quilts laid over the top to keep in the heat, and shredded paper to soak up their droppings. They have a heat pad and a heat lamp. The brooder needs to be kept at about 95 degrees for the first week and 5 degrees less every week until the outside temp matches the inside one. On the first night, we thought they would be fine without anything covering the corral since it was 95 degrees in the shed itself during the day. When I went out to check on them they didn't scatter when I reached in to pick one up. I thought I had gotten some really friendly chickens! Not so, the temp had dropped and they were lethargic. Oops! Some quilts
to keep in the heat and a different bulb in the lamp and they're scootin' around like crazies, jumping on each other. The chicks like to jump on the backs of the ducklings and ride them around. It's quite entertaining. Our town limits the number of farm animals residents can keep based on acreage and zoning. We are allowed 12 fowl so half of the chicks and the all the ducks are going to my Mom. She lives on a lake and the ducks will have a good life but I would keep them in a heartbeat- they are so cute!

I've been asked a few times why I want chickens and it's not just for the eggs. Now, the eggs are the main reason since "pasture fed" eggs have been tested to be high in the good stuff (omega 3 etc) and low in the bad stuff (cholesterol, fats) and it's really hard to find eggs labeled "pasture fed", outside of a true farmers market. This doesn't mean free range or cage free, both of those are arbitrary to the farmer- to label eggs "free range", the farmer only has to provide access to the outside, whether the birds actually go outside doesn't matter. And cage free just means they are all packed into huge coops, often with their beaks trimmed off so they don't fight and injure each other. "Pasture fed" means a portion of their daily food comes from foraging for bugs and seeds in the outdoors. This is where my other reason for having chickens comes in. They eat bugs. They dig up grubs that eat the roots of plants.
They eat ticks and fleas and beetles. They love ant eggs which cuts down on the population of ants. They eat slugs and snails. They eat flying insect eggs that are in grass, reducing the insects around the house. When moved around the yard, they leave behind healthier grass with less weeds since they eat seeds too. They eat a lot of the food garbage that we put in the compost since we can't put it down the sink, like the stalks of broccoli (shredded) and apple and veggie peels. Since they scratch and dig for their food, they turn the top layer of soil, aerating and making it healthier. This is also the reason they shouldn't be confined to one area, they'll overwork it and it becomes a muddy mess. They stay close, usually the boundaries of a yard and can be trained to come when called (with the sound of a treat shaken in a jar), they put themselves to bed in the evening, relying on their humans to close the coop door and make them safe. As I've said before, this is an experiment, hopefully all of the things I've read and been told by other backyard chicken farmers will be true in my yard and I'll not only have delicious eggs every day, but a healthier yard without spraying chemicals.

Monday, May 3, 2010

The Master Bedroom Floor is Started!!

Yes, we are finally moving into the latter stages of the master redo. The bath is 90% there and Wino is itching to get into the (slightly) bigger bedroom. A few weeks ago, I had decided on a carbonized strand woven bamboo for the floors on the bedroom level. Here's my logic- I needed a wood floor that could withstand 48 dog nails tearing around, I wanted something renewable and prefinished. Solid as opposed to engineered, but stable through humidity changes. This bamboo had everything. The strand woven bamboo is twice as hard as oak and three times more stable. If it's carbonized, the color is a warm brown that goes all the way through (they heat the bamboo and caramelize the sugars in the wood). The strand has a nice color variation that makes it look a little more like tradition hardwood too. I had decided on this product but hadn't found the price I wanted. Looking online means factoring in shipping which can get very expensive. It's a better price per sqft but with shipping, well, it's a challenge. Wino said 'let's get it!' so I got online and it happened to be Earth Week and many home improvement suppliers were having eco-friendly sales. I find the bamboo I want at 60% off (I had looked at this online store before and it really was 60% off the price they usually sold it at) plus free shipping! That's huge because the shipping cost should have been $420. So I bit the bullet and ordered the floor, not just for the bedroom but for that whole level it was such a great price, hoping the boxes would be light enough to put into my car to drive up the driveway since freight carriers only do curbside delivery.

No such luck on the weight of the boxes. They weight about 80 lbs, are over 6' long and awkward as hell. The freight truck shows up as they are replacing the guardrail on our street right in front of the driveway and have one lane blocked off. He's now blocking half of the remaining lane. The driver has the wrong phone # on his form and can't get a hold of me so he finds my neighbor at the bottom of the hill. Jim drives up to get me, chuckling about the situation. He graciously offers to get his dump truck (he's a landscaper) from a worksite close by to load the flooring cartons (22!). So we're blocking the street for about 45 minutes, the township workers are shooting daggers at me with their eyes, and the driver's forklift won't work to move the pallet of flooring to the end of the truck. It was a bit of a mess but with much help from my neighbor, we were able to get all of my new flooring into the garage.

Wino had the pleasure of moving seven cartons into the master bedroom to "stabilize to the humidity of the room prior to installation". He moved the rest over the next few days into the office (because there isn't enough stuff in there already) just to get it out of the garage. Having it in the way in the house is also a form of psychological warfare- we're more likely to be motivated about installing it if it's constantly in the way. At least that's what I tell myself. Next step- subfloor.

Tuesday, April 27, 2010

Recycling Old Hinges and Hardware

In recycling our old ugly doors into much better looking ones, one of the mini-projects was to paint the hinges. I have developed a method for rehabbing metal fixtures and hardware that works pretty well, looks good and saves money. The reason for reusing the hinges was that installing new hinges would be a pain in the ass, but it always looks nice if the hinges match the other door hardware. In the house in TX, the original door and hinge hardware was a vintage oil rubbed bronze. Right now, this finish is very popular and it's one I like and use often. In adding new vintage doors and restoring the others that had been "updated" I refinished glass or porcelain knobs I purchased at a salvage yard.

The best way to match another color is to layer similar colors. I learned this technique at the Los Angeles Opera, dying character shoes to match fabric swatches. I'd spend the day taping off the soles and buckles, then sit outside on the loading dock with 20 cans of different colored spray shoe dye, layering the colors until it matched the swatch. If it got too heavy looking or thick (it might crack with wear), I'd start over by removing the dye with acetone and trying different colors. This same method works with any metal fixture or hardware. Here's the general steps:

Clean the piece you want to paint. I use soapy water if it can but light fixtures or anything electrical should only be wiped down. Sometimes really old stuff that's been sitting in a garage or shed takes a little elbow grease to clean but it's imperative that any oil, dirt, or flaky paint is removed.

Many newer fixtures and hinges will have a clear coat on them that needs to be removed. Even if it doesn't, this step is important. Using no less than 220 grit sand paper (400 for metal is best but i'll use what's on hand) gently sand all of the surfaces that will be painted. A lot of times, brass will turn silver colored, that's fine, it means the finish is roughed up enough. Getting every surface can be a challenge on fixtures with decorative stamping but wrapping the tip of a pencil in the sand paper can help get at those tough spots.

I'll usually wipe the piece down with mineral spirits to get rid off all the dust, then tape off anything that doesn't want to be painted. This part is very important to how the finished product will look so the tape needs to be perfect. I use blue painter's tape, mostly because it's what I have but masking tape also works. Clear packing tape does not work. Tried it in a pinch, huge mess.

Use a primer made for metal for the first coat. If the finish color will be dark, using grey or red primer is fine but use white for anything in the silver/chrome family. I use whatever can still has paint in it. Painting technique is important here so don't rush it and if it looks bad, use mineral spirits to remove the paint that's been applied and start over. In a well ventilated area, spray in light coats, pressing and releasing the spray tip when not pointed at what's being painted. This means pointing just above or next to the piece, start to paint, sweep across the piece and release the tip once past the piece. It sounds hard but it's really easy with a little practice.

Follow the directions on the can about dry times. I always try to read this in the store before buying because each product is so different. I once bought a primer that took 48 hours to recoat. What a pain! An afternoon project took a week. Anyway, after the primer coat, apply a light coat of the next color. To do the hinges, I used a semi-gloss brown I had from another project. Two light coats and the primer was covered. The next paint I used was a "hammered metal" paint. If this is applied lightly, it gives just enough texture. I didn't want to cover the brown, just dust it since the hammered metal paint was a little too grey/brown. If it looks too light after that, a dusting of the first color or even black can give nice texture. The additional coats don't want to be completely uniform because you want the underneath colors to show through, mimicking tarnish and wear of an antique finish.

If you're painting something
that will be installed with screws that will show, the heads of the screws can be painted too. Care should be taken when installing the screws so as to not strip the paint. I drill holes in a scrap of wood and set the screws upright in it and paint them as I paint the other objects.

Once happy with the look of the piece, a durable clear coat is important. Even with a clear coat, if the piece is in a high traffic area, it might get scratched, so this method is better for things that don't get handled. I once painted a brass metal door knob to match other vintage ones and it looked great until I turned it with my keys in my hand and left a beautiful brassy scratch along the top. Clear coat can only do so much.

This is a great way to recycle what's already in the house, especially if the design is beautiful, just not the finish, or it's something that's a bit tired looking. And for the hardcore- dents, gouges or rust damage in the metal can be patched with Bondo and sanded. Bondo can be found in small tubes (or gallon size tins) at any automotive supply. Sanded with 400 grit, you'll never know the damage was there. This is great to use when repairing instead of replacing.

Monday, April 26, 2010

Replacing an Ugly Door with a Fire Door

This is the first house I've owned that has an attached garage. In having the garage attached, the door between the house and the garage needs to be a steel 20 minute-rated fire door for it to be code. Ours is a lovely, brown, hollow-core door with a peephole. The peephole is just weird but did make it obvious if the lights were left on in the garage. The door fit fine but had air gaps all the way around when closed. I was once doing laundry and heard this long whoosh sound and realized it was the door, exhaling our precious heated air into the cold garage. Even in the dead of winter, the garage never seemed to get much colder than 55 degrees, now I knew why. Wino solved that problem with more weather stripping than door. After that, the door needed to be slammed, not once but twice to get it to latch. Sometimes, when it's nice out, I wouldn't even bother latching it. Too much trouble, and it threatens to knock over lamps and such in the living room above it. This situation needed to be fixed and I knew we really needed to just put in a fire door but, even though I have replaced many doors, I had only installed one pre-hung door; double french doors into a new opening at the CA house. It had been a while and we didn't have to sort out someone else's messy rough-in. I wanted to make sure that having the door missing for an entire day wouldn't be a problem, like say, doing it during the winter would suck all the heat out of the house. I mentioned this to the HD door guy who said "well, installing a pre-hung door shouldn't take more than 30 minutes!". I just looked at him, smiled and nodded. He's never worked on OUR house. We bought the door a few weeks ago at Lowes, their price on the same door was about $40 cheaper than HD but they only had a few (new item for them) and only one in the right size and handing (which way the door opens) so we bought it that day. Go in for drawer glide, come out with fire door. Sounds about right. Each following weekend, there were things to do, people coming out to visit, other more pressing projects. This was not something I was willing to try by myself, if only because of the thought of trying to hold a door plumb and square, keep it from falling out the hole, then putting screws in it. Well, waiting until Wino had a few free hours seemed like a better idea.

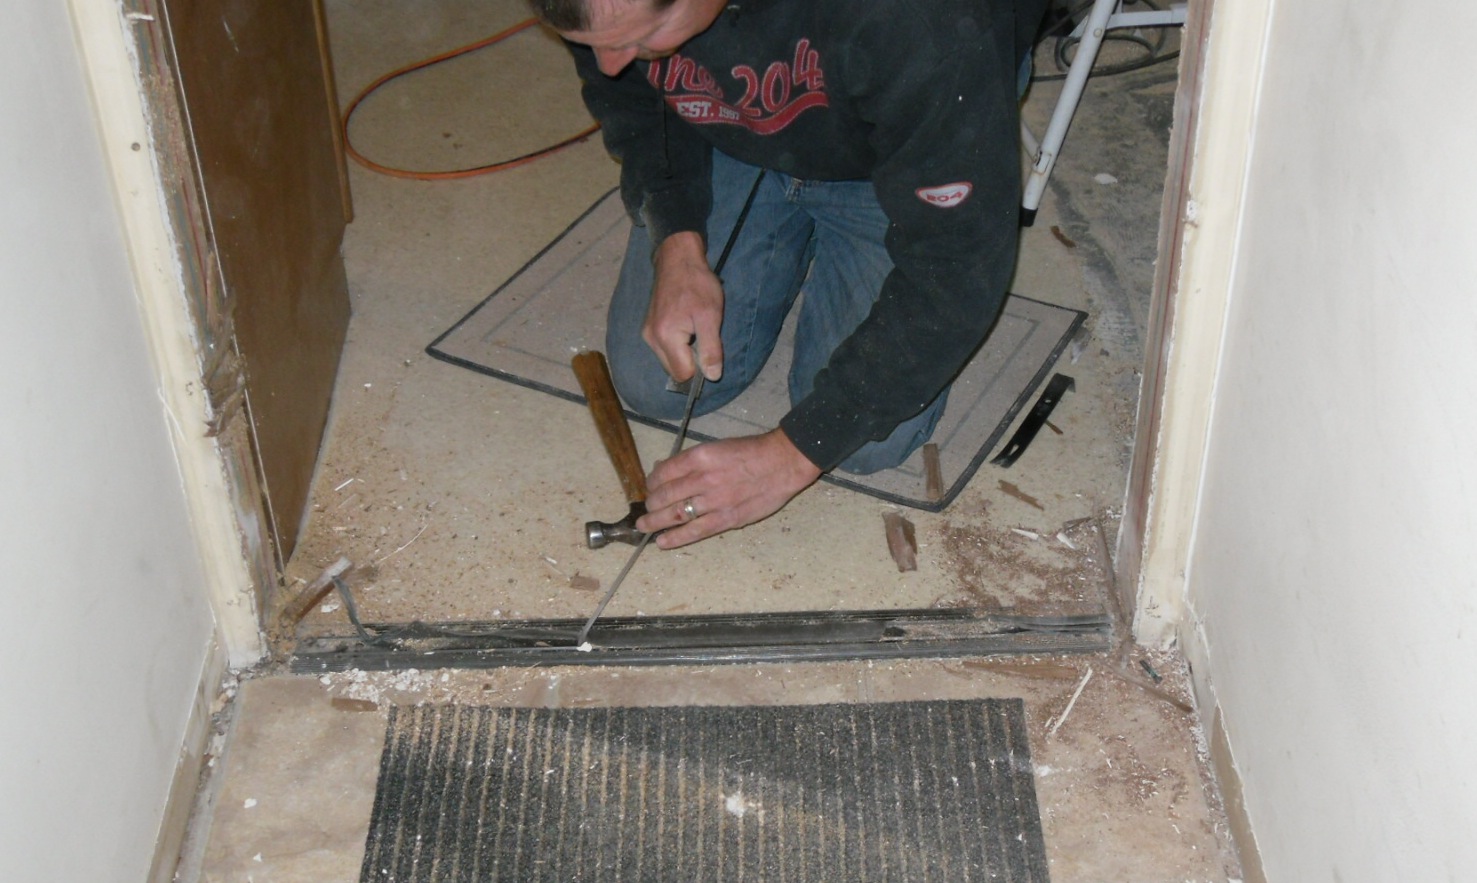
Putting in a pre-hung door, in theory, is much easier than replacing just the door and having to fit the hinges and door to an existing finished opening. Tearing out the old door and the jambs wasn't bad, we used a recip saw and cut the nails holding the jambs in place. It was a little awkward because of how close one side is to some cabinets but it got done in short order. A little cleanup, check the plumb of the rough opening and we're ready to go. We dry fit the door first and realized the brick molding on one side had to be removed and the top corner of molding cut down because of those pesky cabinets.
The molding on the outside basically lets you just push the door all the way in, then you can open the door, plumb and level the sides, shim and put in the screws. If the molding is missing on the hinge side, like in our luck, when you open the door to get the jambs to level and plumb, the weight of the open door slowly tweaks out the bottom, the top tweaks in and twists the whole thing. Especially if you aren't paying attention to it because you're trying to make the other jamb perfect. Aaargh! Ok, lets install the hinge side first. Smart. That side's in and I get the little level to check the threshold because the other side wasn't behaving and -what? Is there supposed to be cardboard under it? Crap! Out comes the door, we apparently missed the stealthily placed cardboard that protects the underside of the threshold. Ugh. I had put silicone all along the threshold so it was a gooey mess. No wonder it was off, there were staples sticking out on one side. So we clean up that mess but before we can put the door back in, Wino decides we need proper shims. We were using scraps of wood which admittedly were not the easiest thing to use but he says shims would make everything easier. Oh, is that what would make the install easier? Goodie! So off he goes to Ace for shims and I decide it's time for lunch. Being that it was 10 minutes to 5 on a Sunday evening- crap! late lunch- the Ace was closed and so were the other stores he tried, not willing to drive to Lowes or HD just for shims. So after wasting about an hour looking for shims, Wino came home and made shims himself with wood scraps and the chop saw. There comes a time in all projects where I've learned to just nod my head and move forward. Following the directions that came with the door, we trued up the hinge side and put "temporary" screws in to hold the whole thing together and I left to walk the dogs. Wino finished the screws on the other side, and when I returned, I stuffed some insulation into the gap overhead, hastily installed the deadbolt and latch and called it a night.

The next day was spent re-installing the trim around the door, which oddly did not just go back up. Two tubes of caulk later and I felt the door was relatively weatherproof. Well, until I shut the door standing on the outside with the light on inside. Major gaps from the latch up to half way overhead. It took some adjusting of the strike plate for the latch but it now closes tightly with no gaps, but you still have to pull it shut a bit. It still needs the nail and screw holes patched and the trim and door painted- the door comes primed in grey. All that is a project for another day when I'm avoiding a different project and I can leave the door open for at least several hours.

Wednesday, April 21, 2010

The Spa-worthy Bathroom is Finished!

The best motivator for projects is a visit from family or friends. Last weekend my mother came out to visit to help sort out the garden -I despise gardening but like the romantic notion of going out into the garden to gather fresh veggies and herbs for dinner- so the week prior, I made a real effort to finish up what was left to do in the master bath.

Wino did a really nice job grouting the entire bathroom floor, which I really appreciated but since Wino was at work during the week, I had to man-handle the shower door myself. The glass door is huge, awkward, and heavy so I moved it by propping it on the toes of my boots and scooting it across the room into the bathroom. Fun. I thought I had purchased the 6mm glass but apparently, I bought the 10mm glass which basically means it's heavy as hell but looks even better. The directions were less than stellar with misprint numbers and strange sentence formation making it a challenge. I had expected it though since I bought a different shower door from the same company for the master bath in TX, and had the same issues. We cheated a little on the shower head and purchased the same shower column that we had in TX.
Wino really liked it and I was unable to find anything comparable for less money. It has a separate dial for water temperature that allows you to turn the shower head on and off without having to readjust the hot/cold mix. This is good in summer when washing hair or shaving legs. It also helps to conserve water. The body jets on it are a bit of a joke, but having the separate handheld shower head is nice. The install was easy, mostly because we were familiar with how it gets installed and were able to prepare the water lines coming out of the wall. Installing it in TX was a real trial but at least we had the learning curve for here.

We went with a basic but stylized 1.6 gallon flush toilet. Because of the size of the sink, the tank needed to be more narrow than traditional toilet tanks and this fit nicely. Wino installed it in one evening but I had forgotten the flexible water line for so it sat useless for a few more days. One thing I learned when looking for a toilet was to check the MAP rating, this is flush power and tops out at 1000. Most new toilets today are rated very high but the cheapie toilets are not. I also would have preferred the round front toilet instead of the elongated but ordering it was just not an option this time. We went to buy a toilet and were determined to come home with a toilet.

The sink was the last thing to go in since I was building the cabinet for it to sit on and had been slacking off on that project.
I still haven't built the drawers but at least I got the sink in and working. Figuring the water lines should have been easy but the "plumbing expert" at HD had me buy the wrong splitter valve but a different associate sorted it out for me. The faucets we bought also were a little different from what I've installed in the past but we really liked them and they were an awesome price. The sink went in relatively easy, but again, Wino was at work so I had to lift, carry and place this monstrosity alone. My biggest fear wasn't that I'd throw out my back but that I'd trip and drop the sink or whack it on the doorway or something and chip it. My luck held and the sink went in ok. It's actually bolted to the wall so the cabinet is mostly decorative, but it does take a little weight.

As much as I'd like to say the bath is totally finished, it's not and won't be for a while. All the little things at the end of a big project are the hardest to finish. Also please note that the links for products are just to give the product info, I don't think it's where I actually bought them from. I got much better deals and paid way less than what the list prices are now. I purchased most of the big stuff for the bath right before xmas and was able to really save with free shipping and holiday discounts.

With company coming this weekend for dinner, maybe I'll get the motivation to finish up the drawers for the vanity and the cabinet doors. Fingers crossed!


Wednesday, April 14, 2010

Cosmetic Surgery for a Poor, Ugly Door

I have ugly doors. It's true. All of them. Ugly. Brown. Hollow core. Shameful. It's something I didn't really take too much notice of when looking at the house initially but as it turns out, it bothers me. The last two vintage houses we lived in had really pretty doors, original to the
house, mostly. So I knew I would have to change out the doors. Easy, right? Well, if you've ever hung a new door in an existing opening, it's a bit of an art and a lot of a pain in the ass. One thing positive about our ugly doors is that they all work, open, close and latch without too much trouble. Oh, one would think 'isn't that just basic?'. Vintage houses rarely have doors that fit well unless someone else has gone through the trouble of making them fit and latch again. My point is, the doors are fine, functional, just ugly as sin.

In CA, we added a closet to the sunroom by building a new wall parallel to an inside wall. Just for fun (?!), I wanted to put a pocket door in instead of a regular door that would swing into the room. It was a huge pain, mostly due to the bizarre stocking practices of HD, but it got done (git 'er dun!) and we needed a door. I had my sources for vintage doors but I wanted something that would match the rest of the house (one lite or three lites) and not cost an arm and a leg with lots of rehab work to do. That's when I came up with altering a cheap prefab door to look like the rest of the doors.

This was my plan with the bathroom door. It leads from the master bedroom to the bath so I decided on glass panes with texture for privacy. Eventually all of the doors in the house will get done the same way but with solid panes instead. This cosmetic surgery works best on hollow core doors that are hung with removable pin hinges. Most older doors are like this. By popping out the hinge pins, you can remove the door without any tools (well, a screwdriver to help pop the pin) and rehang it quickly by yourself.
Using a sharpie and yard stick, I drew out three lites or panels on the door. Didn't like it so I tried four panels. Good! I cut out the panels with a circular saw and jig saw for the corners and was left with four big holes in the door. At this point you can see the guts.
If the door is solid wood, the next step is to put in the trim for the panels. My doors are hollow (see pic) so I cut strips from a 2x4 that would fit into the space between the door surfaces and secured them using a nail gun. Now the trim to hold the panels goes in. I chose to make my own on the table saw with scrap oak in a step pattern but I've bought quarter round profile trim at the home depot before and it works fine and is quicker. Figure how thick the inset panel will be and nail the trim accordingly. Only do one side then paint all the trim, including inside where the glass will sit.
I set the glass using painters caulk to stabilize it because glazing points would stick out too much. On this door, I used clear glass with a panel of textured plastic set on top to give a little privacy. It was a lot cheaper than buying textured glass and it gives a little protection to one side of the glass. Set in the panels and nail in the trim to hold it in place. I use short finish nails on one side incase I need to remove the trim to replace the glass panel. A few coats of semi-gloss paint and voila! a new, pretty door.

Using glass panels and adding wood structure makes the door heavier so it's a good idea to make sure the hinges are solid. I took off the hinges on the wall side to paint them and found they were installed with 1/2" screws. After painting, they were reinstalled with 2" screws. I chose to paint the hinges, which were spotty, tarnished brass, to match the new locksets, 'venetian bronze'. I will do another post on recycling hinges and fixtures by painting them, a favorite trick of mine to save time and money.

This is a great way to get custom-looking doors without the cost, or match a new door to vintage ones already in the house. This process can also be done to sliding closet doors to make them more useful, installing mirror in the panels. There are so many variations on this idea, one is only limited by creativity.